On this page
- Step 1 — Open the Team Section
- Step 2 — Open Work & Permissions
- Step 3 — Configure Role and Status
- Step 4 — Assign Services
- Step 5 — Assign Locations
- Step 6 — Save Changes
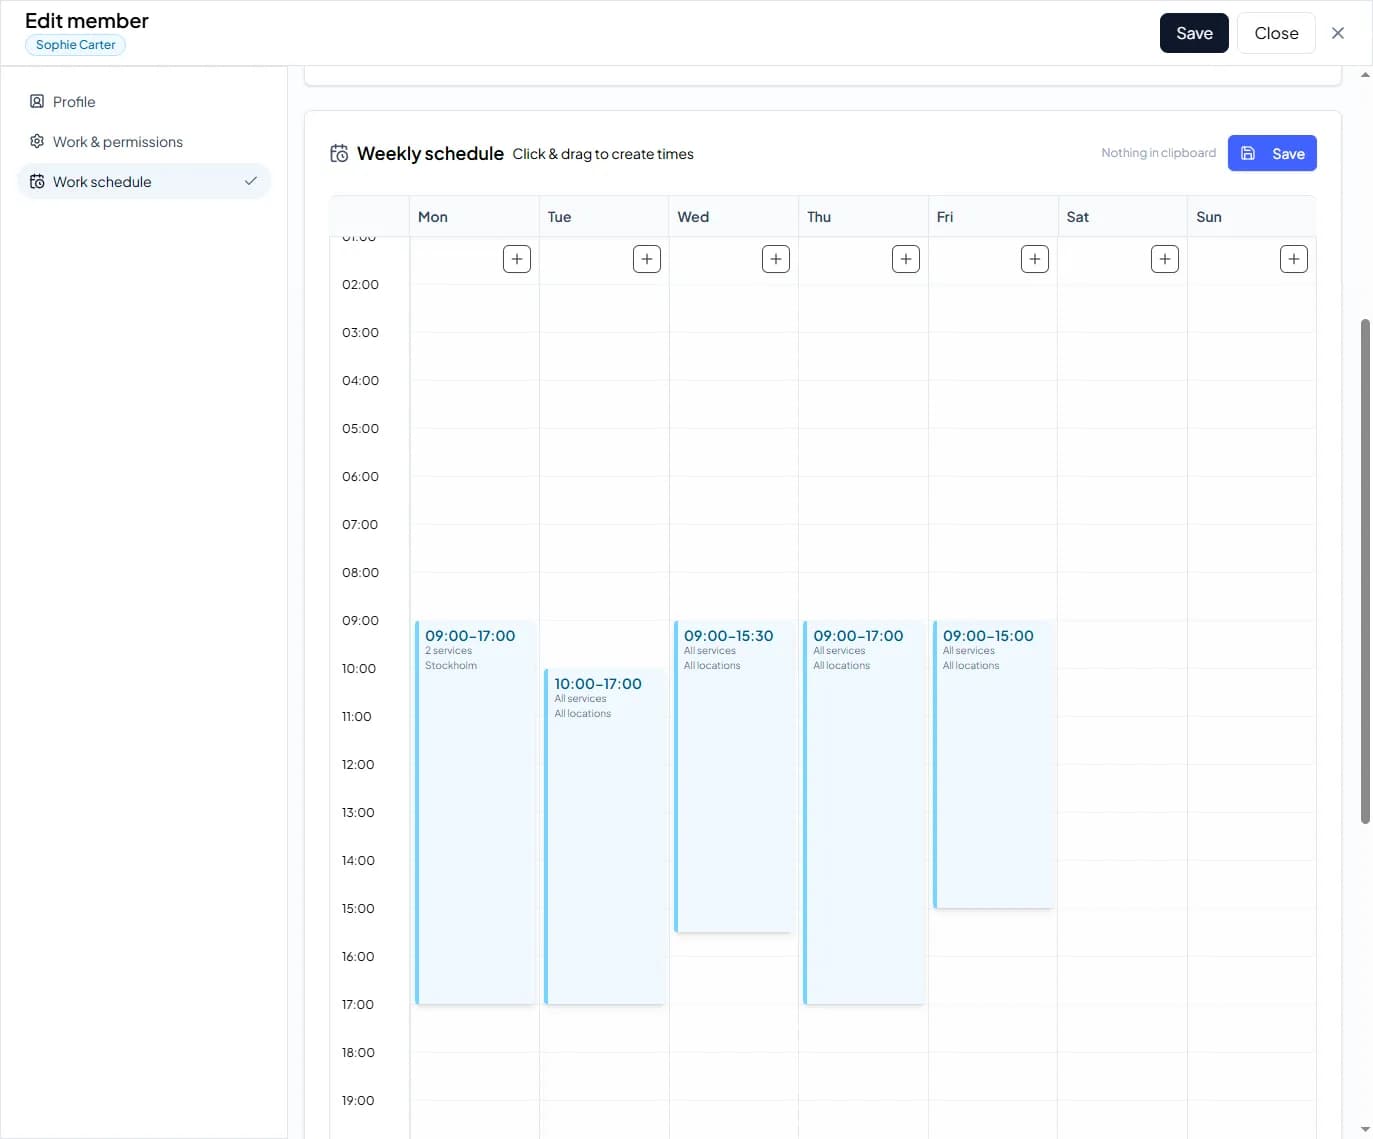
- Step 7 — Set Work Schedule
- Step 8 — Create Working Hours
- Step 9 — Save the Schedule
- ADDITIONAL SETTINGS
- Work & Permissions
- Work Schedule
- RESULT
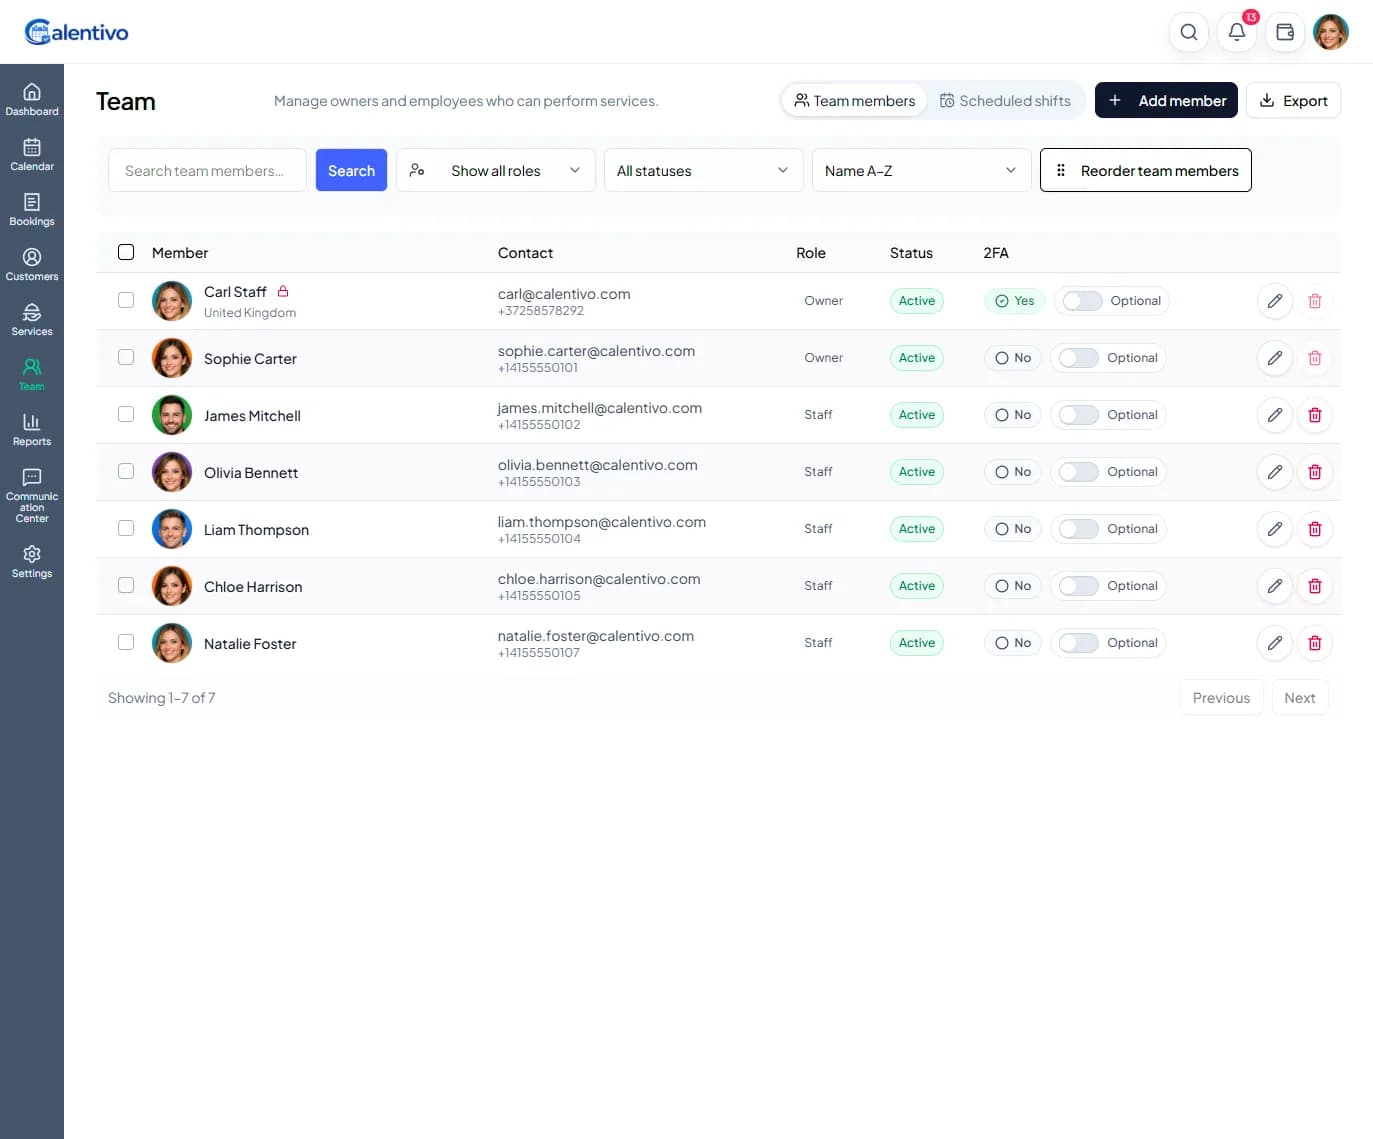
Step 1 — Open the Team Section
From the left sidebar, click Team.
Here you will see a list of all team members, including:
Name and profile
Contact details
Role (Owner or Staff)
Status (Active/Inactive)
Permissions such as 2FA
To edit a team member, click the edit (pencil) icon next to their name.
Step 2 — Open Work & Permissions
Inside the Edit member view, select Work & permissions from the left menu.
Here you can control what the team member can access and do in your system.
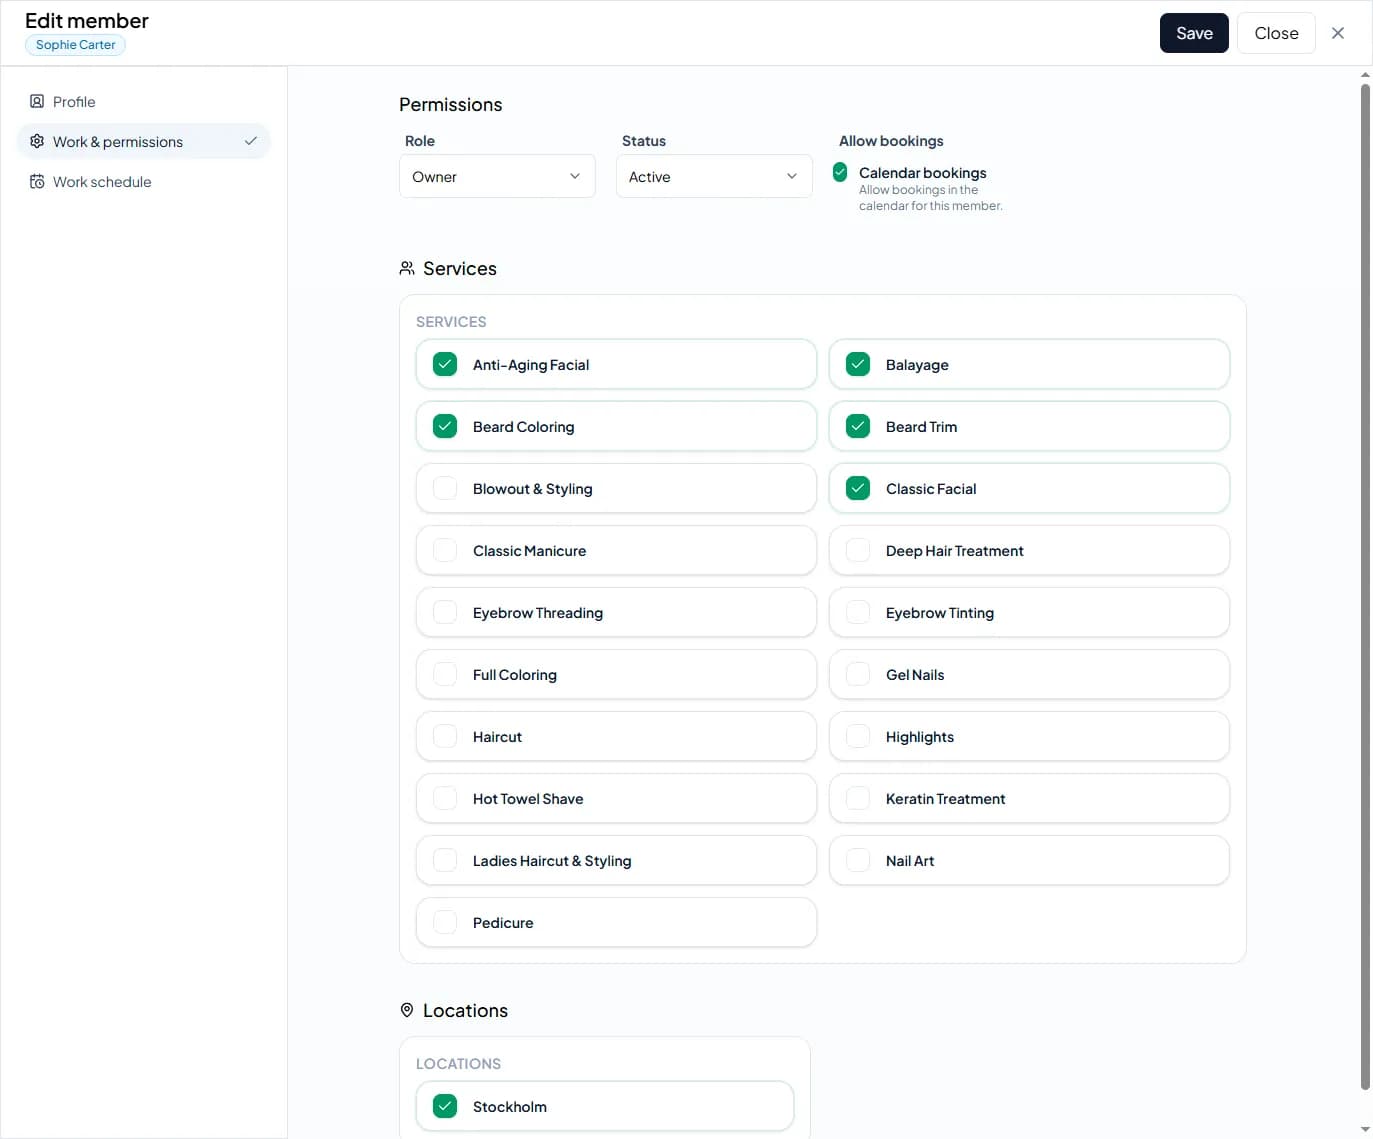
Step 3 — Configure Role and Status
At the top of the page, you can update: